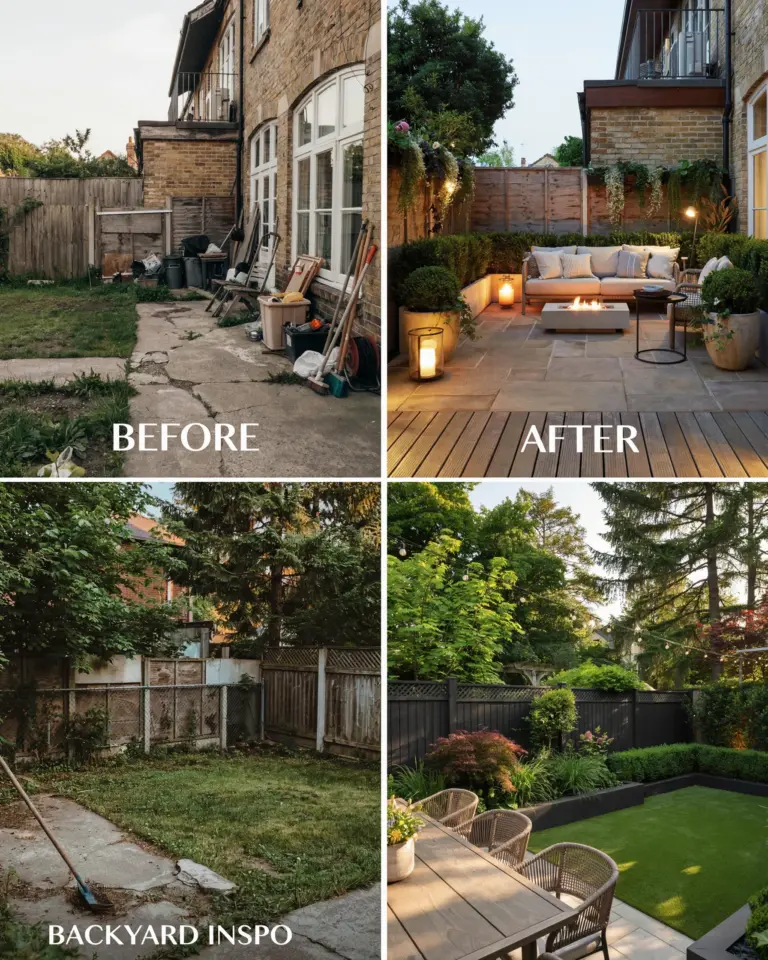
You see those stunning before and after garden makeover ideas on Pinterest and think, “I could never do that.” But the truth is, most of those transformations started with someone making a few costly blunders first. I have made plenty of mistakes myself, and I have watched neighbors tear out perfectly good plants only to start over. The difference between a failed backyard project and a successful yard transformation often comes down to knowing what not to do. Let me walk you through the most common garden makeover mistakes and how to avoid them, so you can keep your budget garden on track and actually enjoy the process.
Budget Garden Transformation Mistakes: Starting Without a Plan
The biggest mistake I see people make is rushing out to buy plants, pavers, and paint before they have a clear idea of the final layout. You end up with a random collection of items that never quite work together. A friend of mine spent $400 on shrubs that looked gorgeous in the nursery, only to realize they needed full sun in a shady corner of her yard. Within two months, she had to dig them all up and start over.
Instead, grab a notebook and sketch your space roughly to scale. Mark where the sun hits at different times of day, note drainage problems, and list how you actually want to use the yard (cooking, playing, relaxing). Only then should you pick materials and plants. This simple step will save you time, money, and frustration.
Simple Flower Bed Renovation Tips: Overlooking Soil Health
People often think a flower bed makeover is just about buying new flowers and arranging them prettily. But if your soil is compacted, sandy, or full of clay, those new plants will struggle no matter how lovely they look on day one. I have done this myself, planting a dozen lavender plants in heavy clay soil, and they were all dead within three weeks. The mistake was thinking I could skip the hard work below ground.
Here is what actually works. Before you plant anything, test your soil. You can buy a cheap kit or just dig a small hole and see how it drains. Add organic compost, aged manure, or peat moss depending on what you need. For a quick fix, spread a two-inch layer of compost over the bed and work it into the top six inches. This one step makes more difference than any fancy plant selection ever will.
Patio Redesign on a Budget: Choosing the Wrong Materials
A patio renovation can eat your entire budget if you go with trendy materials that cost a fortune to install. I once helped a neighbor who insisted on natural stone slabs, and the price tag for just the delivery made her gasp. She then tried to cut corners by laying them without a proper base, and within a year the stones were uneven and dangerous. That was a painful lesson.
The smarter route is to pick materials that offer durability without the premium price. Consider concrete pavers, which come in many styles and are far cheaper than stone. Or try decomposed granite, which compacts into a firm surface and costs a fraction of a poured concrete patio. If you really want a high-end look, limit natural stone to a small focal area, like a fire pit surround, and use budget-friendly pavers for the rest.
Outdoor Living Space Planning Errors: Forgetting About Privacy and Shade
So many makeovers focus on pretty furniture and colorful cushions, but they forget that an outdoor room needs walls and a ceiling. Without shade, a sunny patio becomes unusable in summer. Without privacy, you feel like you are sitting in a fishbowl. I have seen people spend thousands on a dining set only to move it inside after a month because the afternoon sun made it unbearable.
Solve this before you buy a single chair. Plant a fast-growing hedge like arborvitae along the fence line. Install a shade sail or a simple bamboo screen. Even a large umbrella can transform a space. The trick is to treat your yard like an extension of your home, not just a patch of grass. Think about sight lines, wind direction, and how the sun moves across your lot. Address those factors first, and your outdoor living area will feel inviting year-round.
Yard Transformation Before and After Lessons: Neglecting Edges and Borders
A common before and after garden failure is the “blurry lawn” problem. You plant a beautiful flower bed, but the grass creeps in, and the edges look messy. The after photo shows a crisp line between lawn and garden, but people often skip that step in real life. I have been guilty of this myself, thinking that a thick layer of mulch would keep the grass out. It never does.
The fix is easy and cheap. Install a permanent edge, either with metal or plastic edging strips, or use physical barriers like bricks or stones. Even a deep trench (six inches wide and four inches deep) can work if you maintain it. The key is to make the border a deliberate design element, not an afterthought. Once the edges are defined, your yard instantly looks more polished and intentional.
Common Garden Makeover Pitfalls: Buying Too Many Small Plants
It is tempting to buy a dozen tiny annuals because they are inexpensive, but that approach often leads to a sparse, patchy look for months. I fell into this trap when I first started gardening, planting twenty small petunias that took forever to fill in. Meanwhile, weeds took over the empty spaces, and I spent my whole summer pulling them. The after photo
#BeforeAndAfterGarden #GardenMakeover #YardTransformation #BudgetGarden #OutdoorLiving
Leave a Comment