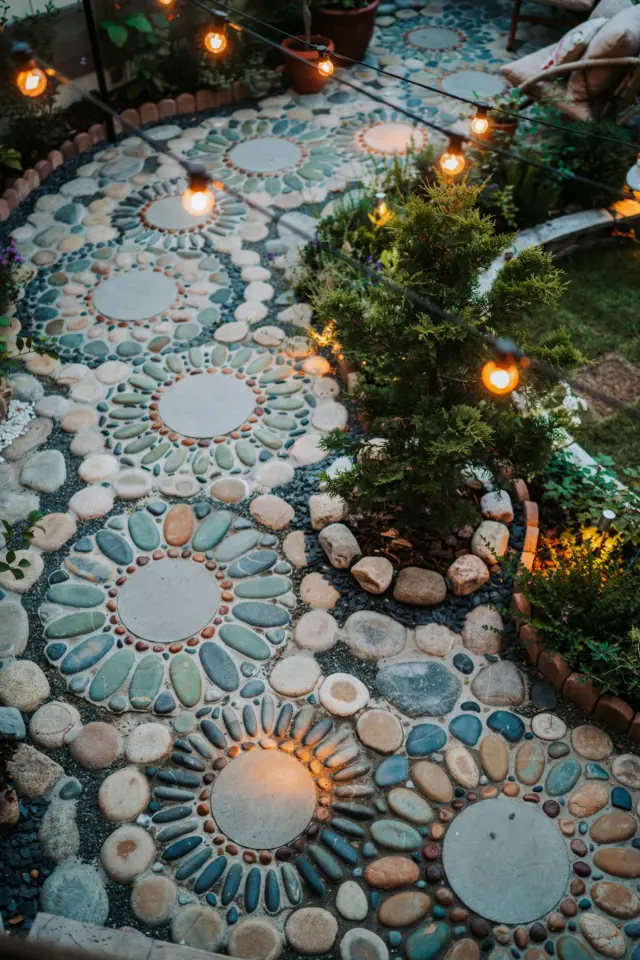
If you have been scrolling through Pinterest lately, you have probably seen those incredible stone mosaic pathways that look like they belong in a fairy tale. That style is often inspired by artist and gardener Jeffrey Bale, whose handcrafted pebble mosaics turn ordinary walkways into living art. The truth is, you do not need to be a professional artist to bring a little of that magic into your own yard. With some planning and patience, you can create a gardenpathdesign that feels personal, textured, and full of color. The best part? You can do it on a weekend, using materials you might already have lying around.
How Jeffrey Bale Turns Pebbles Into Art (And Why It Works)
Jeffrey Bale is known for his intricate, swirling patterns made from small stones, broken tiles, and recycled glass. He does not just throw pebbles into concrete; he places each piece by hand, creating flowing designs that echo natural landforms like riverbeds and tree rings. What makes his work so compelling is the contrast between rough stone and smooth tile, between earthy browns and bright blues. For a home garden, you do not have to copy his complex mandalas. Instead, take his principle: let the material guide your design. If you find a pile of river rocks in different sizes, arrange them in a gentle curve rather than a straight line. That small shift makes your stonemosaicpath feel organic and intentional.
Choosing Materials That Age Well in Your Climate
Not all stones are created equal. If you live somewhere with freezing winters, porous limestone will crack and crumble within a couple of years. Stick to hard stones like granite, basalt, or quartzite for the main structure. For a DIY garden path, you can also use broken ceramic plates or coffee mugs, just make sure the edges are not sharp. I once used old terracotta pot shards for a path in my own backyard, and the rust color faded beautifully over two seasons without losing its shape. Here is a quick checklist for material selection:
- Pebbles or river stones (smooth, non-porous) for the filler.
- Tile pieces or stained glass for pops of color.
- Recycled brick or concrete chunks for strong border edges.
- A good quality mortar or polymeric sand to lock everything in place.
Seasonal Design Ideas for Your Artistic Garden Walkway
Think about how your path will look in different seasons. In early spring, the ground might be muddy, so your walkway needs to be slightly raised or well-drained. In autumn, fallen leaves can hide a low mosaic design, so consider using contrasting colors like white quartz against dark slate to make the pattern visible even under a layer of leaves. For summer, lighter stones stay cooler under bare feet, while darker stones absorb heat and can be unpleasant in direct sunlight. I recommend testing a small patch of your artistic garden walkway in a spot that gets afternoon sun to see if the materials get too hot. If they do, mix in some light-colored pebbles to balance the temperature.
Designing a Pattern That Tells a Story
A straight, boring path is a missed opportunity. Instead, let your walkway mimic something from nature or your own life. Maybe you want a spiral that leads to a sitting area, like a slow unfurling fern. Or you could use a simple meander that follows the curve of your flower bed. Jeffrey Bale often uses motifs like waves, dragonflies, or sunbursts. For a beginner, I suggest a repeating leaf shape or a zigzag that echoes the pattern of a local creek. Draw it out on paper first, using graph paper to scale. Then lay the heaviest stones as a border before filling in the inner pattern. This way, your stone mosaic path ideas stay grounded and do not drift off center as you work.
DIY Steps to Build Your Own Mosaic Path This Weekend
You do not need a lot of fancy tools. A rubber mallet, a trowel, a level, and a bucket of sand will get you most of the way. First, dig out the soil about six inches deep to create a stable base. Fill that with crushed gravel and tamp it down hard. Then add a layer of sand, about two inches thick, and level it. Now comes the fun part: press your stones and tiles into the sand so they sit flush with each other. Once you are happy with the design, brush dry mortar or polymeric sand into the gaps and mist it with water to set. Let it cure for at least 48 hours before walking on it. This method is forgiving, so if you mess up a section, you can pull the stones out and try again.
Keeping Your Mosaic Path Looking Fresh Through the Year
Weeds will find a way into any crack. To minimize that, use a landscape fabric under the base layer, and consider sealing the mortar once a year. In fall, sweep leaves off regularly so moisture does not stain the stones. In winter, avoid using salt or harsh chemical deicers, they can discolor both the mortar and the stones. Instead, use sand or cat litter for traction. A power wash on low setting in spring will bring back the original brightness of your gardenpathdesign. I also like to pour boiling water over any moss that grows between the pebb
#gardenpathdesign #stonemosaicpath #JeffreyBale #artisticgardenwalkway #DIYgardenpath
Leave a Comment