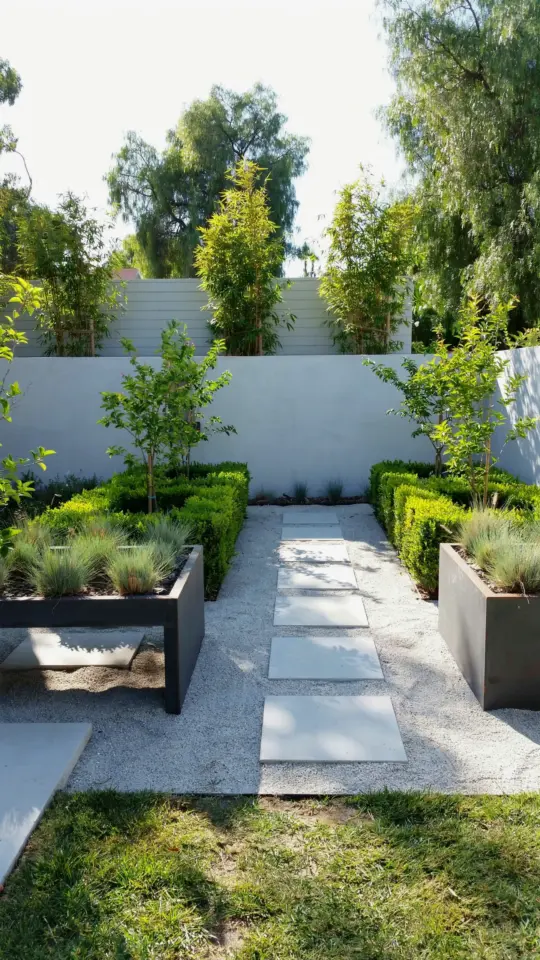
If you have been dreaming of a raised bed kitchen garden design but worry about the cost, you are not alone. I spent months researching layouts that would not break the bank before I found Nicole Burke’s Four Garden Classic layout from Kitchen Garden Revival. It is a simple, four-bed arrangement with a central path that makes the most of every square foot, and it turned out to be the most budget-friendly plan I have ever tried. The best part is that it works for small yards, patios, or even rental properties where you cannot dig up the lawn.
Why the Four Garden Classic Layout Saves You Money
Nicole Burke designed this layout with efficiency in mind. Instead of building dozens of small beds that require extra lumber, soil, and hardware, you build just four symmetrical beds with wide paths between them. That means fewer materials, less soil to buy, and less time spent building. I priced out a six-bed design I saw online and compared it to the Four Garden Classic – the four-bed plan saved me about 40 percent on lumber alone. The layout also reduces the amount of path material you need (gravel, wood chips, or grass). You can even skip the permanent paths entirely and use straw or cardboard covered with wood chips, which costs pennies per season.
Building Raised Beds on a Budget: Material Choices That Work
You do not need expensive cedar or redwood to build beds that last. Here are four affordable raised bed materials that I have tested and recommend for a kitchen garden:
- Untreated pine boards – They rot after 3 to 5 years, but a coat of linseed oil (cheap and food safe) can extend that. I used 2x10s and they held up fine for four seasons.
- Cinder blocks or concrete pavers – Often free on Craigslist or at construction sites. They last forever and let you change bed shapes over time.
- Galvanized stock tanks – Not the cheapest upfront, but they never rot and you can often find them on sale at farm supply stores.
- No-till mounded beds – Skip the lumber entirely. Pile soil and compost directly on cardboard, shape it into a 12-inch high mound, and plant. This is the most budget-friendly option by far.
I personally recommend pine with linseed oil for a classic look that costs less than $40 per large bed. And if you live in a dry climate, untreated pine will last even longer without any treatment.
Planning Your Kitchen Garden Path Layout for Easy Harvest Rotation
The path layout in Nicole Burke’s design is what makes crop rotation simple without needing a spreadsheet. Each of the four beds is separated by a 2-foot-wide path, so you can easily map which family goes where. I use this rotation: bed one gets legumes (peas, beans), bed two gets brassicas (kale, broccoli, cabbage), bed three gets root crops (carrots, beets), and bed four gets everything else (tomatoes, peppers, squash). Every year I shift everything clockwise. The paths stay the same, so I never have to think about moving beds or rebuilding. This simple rotation keeps soil healthy and reduces pest pressure, which saves you money on fertilizers and pest control.
For paths themselves, I recommend wood chips from a local tree service (usually free). They suppress weeds, stay clean underfoot, and break down slowly. Avoid gravel unless you already have it–it is expensive and traps heat in summer.
Choosing Affordable Plants and Seeds for Your Kitchen Garden
Starting from seed is the cheapest way to fill your four beds. A single packet of seeds ($2 to $4) gives you dozens of plants, whereas nursery seedlings cost $3 to $5 each. For a budget-conscious kitchen garden, focus on plants that produce heavily and reseed themselves. My go-to list includes:
- Lettuce and arugula – Fast growing and you can harvest leaves for months.
- Kale and Swiss chard – Cut-and-come-again crops that last all year
#raisedbedgarden #kitchengarden #gardendesign #nicoleburke #kitchengardenrevival
Leave a Comment