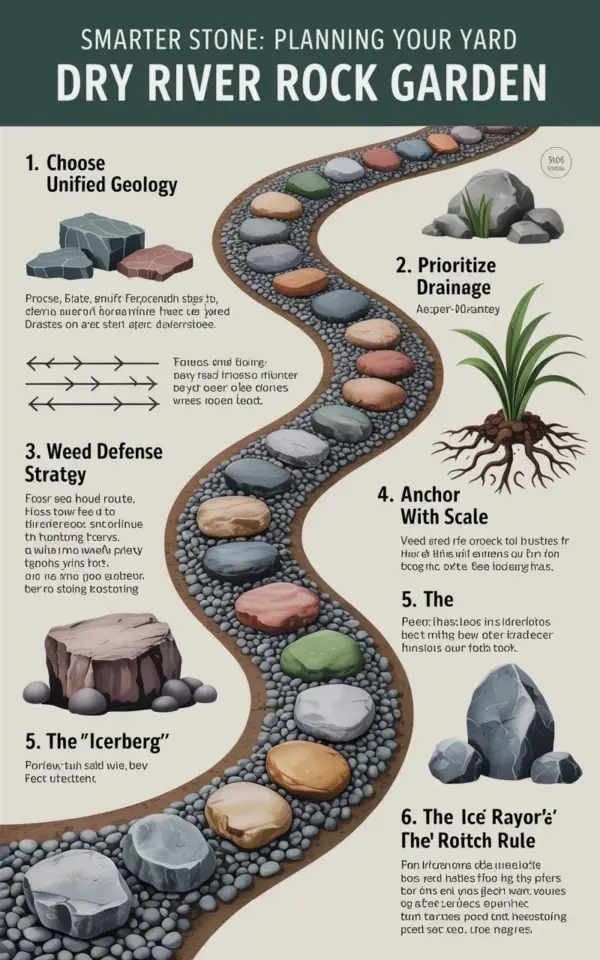
If you have ever stared at a thirsty, patchy front lawn and wished for something that actually looks intentional instead of neglected, a dry river rock garden might be your smartest next move. This is not a complicated, expensive overhaul. It is a straightforward, low-water redesign that mimics a natural streambed, and it works especially well in neighborhoods where water restrictions or simply high utility bills make grass feel like a luxury you no longer want. The infographic I have (the one with the dark green header bar that says “SMARTER STONE: PLANNING YOUR FRONT YARD DRY RIVER ROCK GARDEN”) breaks the whole process into seven clear steps. I will walk you through each one, but with real budget tips and practical pitfalls I have learned the hard way.
Why a dry river rock garden works for budget-conscious front yard landscaping
Traditional front yard landscaping often means sod, sprinklers, and monthly water bills that climb higher every summer. A dry river bed replaces all that with stone, pebbles, and a few well-chosen plants that ask for almost nothing. The initial cost of gravel and larger rocks can feel like a hit, but you pay once and then you are done. No mowing, no fertilizing, no drip system repairs. Over three years, you will likely save hundreds of dollars on water alone.
The other hidden benefit is visual. A winding path of smooth river stones in gray and brown tones instantly gives your yard a natural, grounded look. It does not scream “landscaper special.” It looks like the land decided to show off a little. And because you control the shape and width of the path, you can work around existing trees, utility boxes, or oddly shaped lots without expensive regrading.
Step 1: Choose unified geology without breaking your budget
The infographic starts with “CHOOSE UNIFIED GEOLOGY,” and this is where many homeowners overspend. The idea is to pick one rock family and stick with it. If you mix jagged slate with rounded river rock and porous lava rock, the result looks chaotic and obviously man-made. Instead, pick a single type of stone for your main riverbed material. Smooth river rock in two or three sizes (say, 1-2 inch pebbles and 3-5 inch accent stones) creates cohesion without looking sterile.
To save money, buy bulk from a local quarry or landscape supply yard rather than bagged stone from a big box store. Bagged stone costs roughly three times more per ton. Also, ask if they have “culls” or irregular pieces they sell at a discount. Those work perfectly for the edges of your riverbed where no one inspects the shape. Just keep the color palette consistent: grays, tans, and soft browns blend well with most houses and require fewer accent purchases.
Step 2: Map your path with a hose and a can of spray paint
Before you order a single stone, lay a garden hose on the ground to outline the shape of your river. The infographic shows a gently winding path, and that meandering curve is essential. A straight line of rock looks like a drainage ditch, not a natural stream. Walk the hose line from your front door or street view and adjust until the curve feels organic. Then use orange spray paint to mark the edges. This costs nothing and saves you from moving heavy stones twice.
Keep the width between 2 and 4 feet for a standard front yard. Anything narrower looks like a crack, anything wider can swallow the rest of the yard. If your yard is shallow (less than 15 feet deep), taper the river so it starts wider near the street and narrows toward the house. That draws the eye forward and makes the space feel deeper.
Step 3: Dig shallow and use landscape fabric (do not skip this)
A common mistake is dumping rock directly on top of grass or dirt. Within one season, weeds punch through and the rocks sink unevenly. The infographic step three is about excavation and base preparation. Dig down only 3 to 4 inches for a purely decorative river bed. If you live in a rainy area, dig a little deeper and add a perforated drainage pipe wrapped in fabric. That extra effort keeps water from pooling under your rocks.
Lay heavy-duty landscape fabric (the woven kind, not the cheap felt) over the entire dug area. Overlap seams by at least 6 inches and pin them with landscape staples every 2 feet. This one step eliminates 90 percent of future weeding. I once skipped fabric on a small side yard. Within two years, crabgrass was pushing up through the pebbles and the look was ruined. Fabric costs about $0.15 per square foot, and it pays for itself in saved labor in one season.
Step 4: Place your largest boulders first to anchor the design
Look back at the infographic, and you will notice the larger stones sit at the bends of the river. That is intentional. Big rocks mimic the way water would naturally erode the outer bank of a curve. Place your largest boulders (8 to 12 inches diameter or bigger) first. Tilt them slightly so they look embedded, not perched. Bury the bottom third of each boulder into the dirt so they appear to have been there for decades.
For budget-friendly boulders, check Facebook Marketplace or Craigslist. People often give away large landscape rocks for free when they are redoing their own yards. You just need a strong friend and a dolly to move them. Also, a single large boulder does more for the design than a dozen small ones scattered around. Spend your money on one or two statement stones, then fill the rest with affordable river pebbles.
Step 5: Layer your smaller stones like a natural stream bed
The infographic highlights a mix of smaller rocks and pebbles forming the riverbed, and this layering makes the whole thing look real. Pour a 2-inch layer of your smallest pebbles (quarter to half inch) first. Then add medium river rock (1 to 2 inches) on top, concentrating them in the center of the path. Finally, tuck a few larger accent stones along the edges, pressing them partway into the pebbles so they are not sitting on top.
Rake the surface gently to blend the sizes, but do not make it perfectly flat. A natural river bed has dips and slight mounds. If your yard slopes at all, create a few shallow depressions where water would naturally collect. Those low spots also become perfect places to plant a small sedum or a smooth blue fescue. For a truly low-water front yard landscaping plan, choose plants that need almost no irrigation once established. A few clumps of ornamental grass or creeping thyme along the rock edges add softness without competing for moisture.
Step 6: Edge the river bed to keep rocks where they belong
Rock gardens have a habit of migrating. Rain, foot traffic, and lawn mowers push pebbles into the grass, and suddenly your clean edge looks like a messy spill. The sixth step in the infographic is all about edging. You have a few affordable options. Steel edging strips are durable and nearly invisible. They cost about $1.50 per linear foot and last for years. A cheaper alternative is to dig a sharp, vertical trench along the entire river outline and backfill with the native soil, creating a small berm. That berm holds the rocks in place and doubles as a planting bed for low-growing perennials.
- Steel edging: best for straight or gently curved borders, very sturdy.
- Plastic edging: cheaper but can buckle in extreme heat; replace every 3 years.
- No edging (berm method): free but requires annual maintenance to keep the shape.
- Stone border: line the edge with flat flagstone set flush with the ground. Looks natural, costs more upfront but lasts forever.
Choose the method that fits your budget and your tolerance for annual touch-ups. I prefer a combination of steel edging on the street side (where the lawn mower hits it) and a soil berm on the house side, where foot traffic is light. That saved me about 40 percent on materials compared to edging the entire shape.
Step 7: Add the final touches without overdoing it
The infographic ends with a finished river bed that looks like it has been there for years. For the final step, step back and assess before you add anything else. Do not clutter the edges with dozens of tiny decorative objects. A dry river rock garden is meant to feel calm and uncluttered. A single bench, a weathered log, or a small boulder cluster near the entrance can serve as a focal point. If you want lighting, use low-voltage path lights tucked behind the largest rocks so the light spills across the pebbles at night without calling attention to the fixtures.
Water the entire river bed once after installation to settle the pebbles and wash off any dust. Then you are done. Maintenance from here means an occasional leaf blow (use a leaf blower on low setting so you do not scatter the rocks) and a quick check for weeds every spring. That is it. No watering schedule, no fertilizing, no weekly trimming.
A dry river rock garden is one of the most forgiving, affordable front yard landscaping projects you can take on. The seven steps in that infographic are not just a pretty picture. They are a real, repeatable system that works whether your yard is a tiny rectangle in a subdivision or a wide lot with slope issues. Start with unified stone, measure your path carefully, and invest in good landscape fabric. Those three choices alone will keep your garden looking sharp for years while your neighbors wonder how you got such a natural look without a professional crew. If you try it, drop a comment below or tag me in your before and after shots. I always love seeing how a pile of rocks becomes something that genuinely feels like the landscape was always there.
#dryriverrockgarden #frontyardlandscaping #rockgardendesign #xeriscaping #gardeninginfographic
Leave a Comment