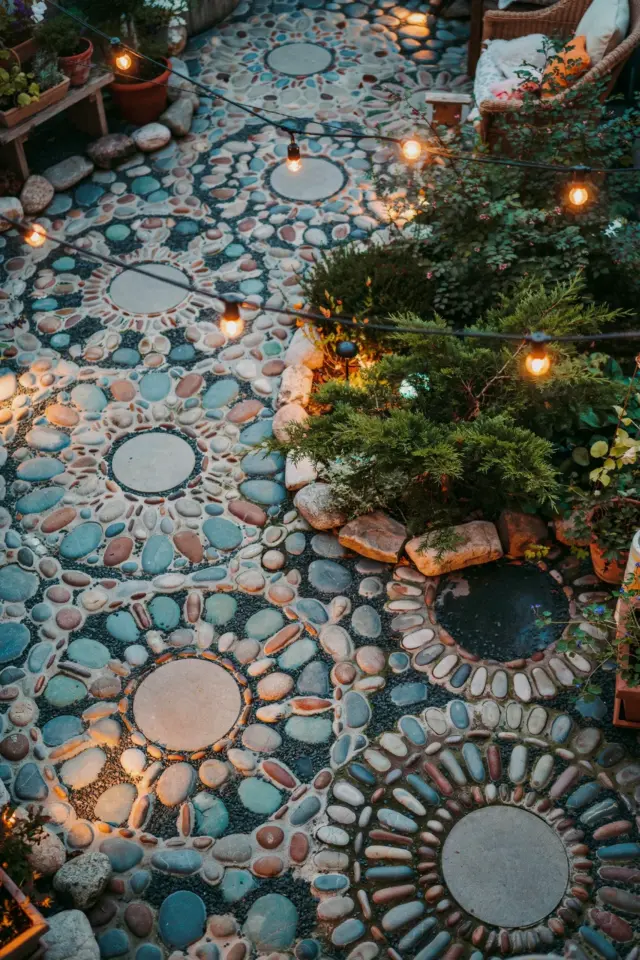
Garden path design before and after photos rarely show a transformation this extreme. Jeffrey Bale’s stone mosaic walkway went from a plain dirt path, the kind you just accept, to something that looks like a medieval cathedral floor. The guy works with pebbles and broken tile and makes it look like a river froze mid-motion. And the best part? Most of his methods translate to a backyard on a budget.
What Makes Jeffrey Bale’s Work Feel Different
Look, I’ve seen a lot of stone paths. Most of them are just flat pavers spaced out like a row of teeth. Bale does the opposite. He sets thousands of small stones on edge, packing them together so tightly that the surface becomes one solid piece. The result is a stone mosaic walkway that doesn’t just lead you somewhere, it makes you stop and stare. That’s the real trick, it’s not about expensive materials. It’s about patience and a very strange eye for color.
The Before, The Mud, The Blah
Every BeforeAndAfterGarden photo needs a truly terrible starting point. Bale’s projects usually begin with a bare dirt strip. No plants. No edging. Just compacted soil that turns to sticky mud whenever a sprinkler gets too enthusiastic. You know the situation. Either you’re walking on it and slipping, or you’re avoiding it entirely and carving a new path through the grass instead. I’ve done both, and neither one feels like a win.
The Money Talk, or Why This Isn’t as Crazy as It Looks
Here’s the thing that surprises people. A stone mosaic walkway doesn’t have to cost four figures. The stones themselves are often the cheapest part. Jeffrey Bale sources local materials, river rocks, leftover granite scraps, even broken plates from a thrift store. You’re paying for labor, and if you’re willing to supply your own, the price drops dramatically. Honestly, the most expensive item on my own path was the bags of sand and cement.
Stone Mosaic Walkway Ideas You Can Actually Steal
One of Bale’s signature moves is the medallion, a circle of patterned stones that breaks up a long straight stretch. You don’t need to replicate his museum-grade detail to get the effect. You can make a small rosette with two colors of pebbles and use plain gravel for the rest. Another idea? Treat the path like a riverbed and let the stones flow in wavy bands instead of straight lines. It hides crooked cutting and looks like it grew there on its own.
- Pebble borders with planted chamomile or thyme between them. Smells great, costs almost nothing.
- A single mosaic medallion at a junction, then a simpler path beyond it. Makes the fancy part feel intentional.
- Recycled brick or broken concrete set in a herringbone pattern. Nobody sees the pattern coming and it’s basically free.
- Odd colored pebbles from a landscaping supply yard. You can pick your own bucketful for a few dollars.
Where to Find Cheap Materials Without a Landscaping Budget
You don’t need a quarry. I got most of my stones from Facebook Marketplace and a local construction site that was throwing away broken granite curb pieces. River rocks show up constantly in the free section. People haul them home for a fire pit, give up, and just want them gone. Also worth checking: salvage yards, tile outlets, and your neighbor’s driveway after they repave. Just ask first.
The Actual Steps, Minus the Fancy Tools
Ok so here’s the real process, simplified. You dig out the path to about six inches down. You fill it with crushed rock and tamp it flat. You mix mortar and lay your stones one by one. Then you let it cure and resist the urge to walk on it for a few days. That’s it. There are subtleties, obviously, but the basic job is just repetitive and slow. Put on a podcast and settle in.
What I’d Tell My Own Lazy Self Before Starting
Start smaller than you think. I once tried to mosaic a fifty-foot path on my first attempt. I got about six feet in and ran out of interesting stones and patience. A weed-whacker keeps the moss and grass out of the edges. And use a rubber mallet to tap stones flat instead of your palm. My palm learned that lesson the hard way. Honestly, a four-foot square medallion is the perfect first project. It gives you the full effect without the burnout.
A stone mosaic walkway is a long game. But it’s also one of the few yard upgrades that gets more beautiful every year as the moss creeps into the cracks. Jeffrey Bale’s work just proves what’s possible when you treat a path like a canvas instead of a utility. Start with a tiny patch, grab a handful of stones, and see what your hands can do. Your boring dirt strip might surprise you.
Leave a Comment