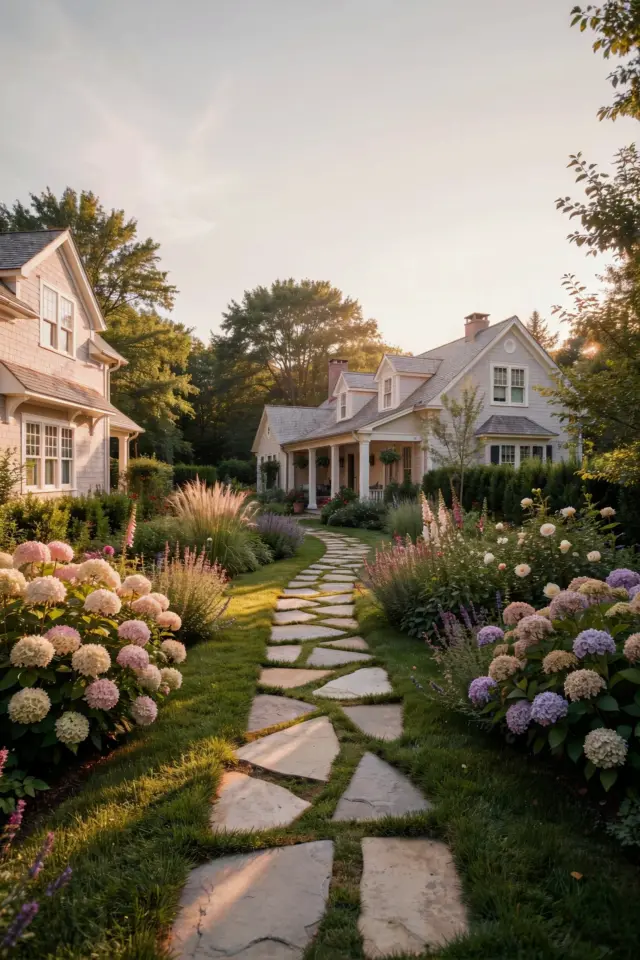
Now, before we get started, I should tell you that **garden paths** are having a serious moment this spring. It’s not hard to see why. A good walkway changes how your backyard feels, turning a basic lawn into a place that looks intentional and loved.
I’m going to walk you through 21 walkway ideas, which honestly is a manageable number even if you’re a total beginner. You won’t need complex tools or a landscape design degree. We’re going to talk about real materials, real budgets, and the kind of shortcuts that actually look good.
Here’s the thing: picking a path shouldn’t feel like a huge commitment. You can always swap materials later. But if you start with a solid base, you’ll save yourself a ton of frustration.
Pea Gravel Paths: The Reversible All Rounder
If you’ve never laid a path before, pea gravel is your best friend. It’s cheap, it’s forgiving, and if you hate it, you can just rake it up and move on with your life. You don’t need to be precise with this stuff, which is a huge relief when you’re working with a wiggly garden hose as your guide.
Here is exactly what you need to get started with gravel:
- A shovel to dig down about three inches
- Landscape fabric to stop weeds from punching through
- Plastic or steel edging to keep the stones contained
- Several bags of pea gravel, certainly more than you think
A gentle S-curve works best with gravel. Straight lines make it look like a driveway. Let the path wander between your flower beds or around a tree. Walking on it makes a satisfying crunch sound, which I personally love, though you might find it annoying if your dog sleeps by the window.
Stepping Stone Walkways: Loose and Easy Layout
Stepping stones are the lazy person’s perfect path. That’s a compliment, by the way. You don’t need to create a solid ribbon of material; you just need to place stones where your feet naturally land. The result looks stylish and, more importantly, it’s simple to install.
Skip the perfect grid layout. That can look a little stiff for a backyard. Instead, space them out at a comfortable stride length, which is usually about 20 to 24 inches apart, and let them stagger slightly. Add moss or creeping thyme between the stones. It softens the edges and makes the whole thing feel like it’s been there for decades.
Okay so, one tip. Buy concrete pavers that have a slightly rough surface. Smooth ones become ice rinks in winter, and nobody wants a slip-and-slide on the way to the grill. Stone veneer looks nice but it’s slippery. If you have kids who run around in socks, skip the smooth stuff entirely.
Wood Chip and Mulch Paths: The Natural Budget Option
Let’s talk about the cheapest route you can possibly take. Wood chips. Honestly, it doesn’t get more budget-friendly than this, and the earthy smell is wonderful in early spring. It’s the kind of path you can use without a ton of planning. Just map it out with a hose, dump the chips, and spread them evenly.
The “fluffy” appearance is great for cottage gardens and woodland areas. However, if you have heavy foot traffic, you’ll need to top it up every year. It breaks down, which is good for the soil but annoying for your shoes when it turns to mush. If you own a lawn mower, this is the material you’ll fight with the most. Chips will fly everywhere.
A proactive tip. Don’t use shredded mulch. Loose bark nuggets actually stay put better and don’t mattress-down as fast. It’s the little details like that which make a garden path feel maintained rather than neglected.
Flagstone Stepping Pavers: The Premium Look
Flagstone is where things get a bit more serious. It’s not a path for the faint of heart, but the payoff is a high-end look that feels like a resort. I used to think you needed professional help to lay flagstone, but if you have the time, it’s absolutely doable.
I prefer irregular flagstone over rectangular pavers. The irregularity gives it a natural character that matches the outdoors. Rectangular stone looks a bit too much like a formal patio for my taste.
Now, here’s the tricky part. You can lay flagstone on dirt or grass for a temporary path. It will wobble. The permanent solution is to dig out the soil, lay a gravel base, sand, and then place your stones. That’s a multi-day job. But, the end result is stable enough to push a wheelbarrow over, and it never shifts under your feet. The uneven surfaces can be a little wobbly to walk on if you’re carrying hot coffee. I speak from experience.
Brick and Paver Patterns: The Classic Charm
Brick paths have been around for centuries, and there’s a good reason for that. They look warm, inviting, and they only get better with age. I am completely biased here, but a curved brick path in a herringbone pattern is just classic.
For beginners, consider a basket weave or running bond pattern. These are easier than herringbone because you spend less time cutting bricks. That wasn’t my first choice. I went straight for herringbone, and let me tell you, some of those cuts are not perfect. But imperfection is part of it.
You will need a solid sand base to keep the bricks in place. The spacing between them might seem too tight, but the fine sand will sift down and lock it all together. Edging is critical here, otherwise your bricks will wander off over summer. Use a rubber mallet to tap them down level. The finished product looks like it belongs in a historical garden, and that’s probably why I love it.
Poured Concrete: The Modern Minimalist
You might think concrete is dull, but honestly, poured concrete is making a big comeback. It’s perfect if you want a sleek, minimalist look. Instead of a huge slab, you can pour individual square or circular pads to create a modern stepping stone path. This is a bit more work, but the result is completely unique.
You’ll need a mold, which you can actually make from plywood or buy cheap plastic forms. Mix the concrete, pour it into the mold, and let it set. Be warned, you need to be patient here. My first slab cracked because I walked on it too early. Annoying.
The best part about concrete is the color. You can add dye to make it a warm gray, a sandy tan, or even a soft terracotta. Use spacers or speed bumps between the pads to keep the grass growing between them. The contrast between hard concrete and soft green grass is so clean. It feels very contemporary and uncluttered. This is what I would do if I didn’t have a toddler throwing rocks everywhere.
Rubber Mulch and Other Textured Ideas
Finally, let me mention rubber mulch or crumb rubber. It looks like wood chips, but it’s made from recycled tires. I never recommend this for high-end gardens. However, if you have a playground area or you’re tired of replacing wood chips every year, it’s an incredibly practical choice.
It never decomposes. It stays soft underfoot. The main downside is that it absorbs heat, so in full sun, this path can get hot. It also has a distinct, slightly rubbery smell for the first few weeks. For a casual garden, this is a massive timesaver. You won’t be out there re-spreading it every month, which gives you more time to actually enjoy the backyard.
Anyway, here is the reality. You do not need a huge budget to have a great season. Just grab some gloves, a shovel, and get outside. Look at what you have, measure your space, and start digging.
I hope one of these 21 walkway ideas sparks something for your own yard. Save this list for planting season, and let me know in the comments which path style you are stealing this spring. I’d love to hear if you go for the brick or the pea gravel.
#gardenpaths #backyardwalkway #springgarden #walkwayideas #gardendesign
Leave a Comment