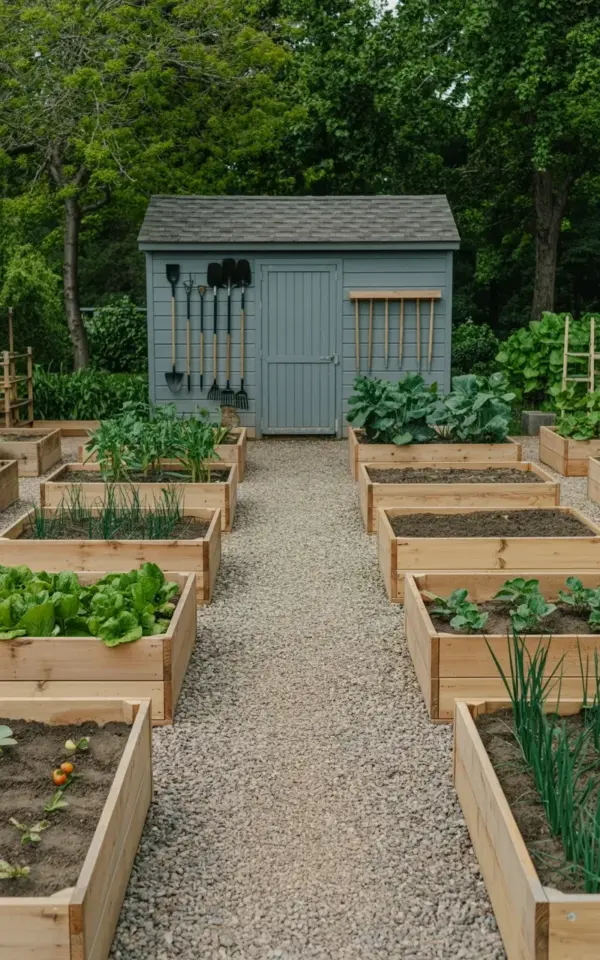
Weekend project? More like a month of planning and three weekends of labor. But this vegetable garden before and after is the one I keep staring at from my kitchen window. I replaced a rectangle of sad, patchy grass with symmetrical raised wooden beds full of leafy greens, and connected the whole thing with a light beige gravel path. The gray garden shed at the back now holds shovels and rakes on the wall, right where I can grab them. Honestly, it’s my favorite thing I’ve done to this house.
Why the grass had to go
The old yard was a lie. It looked green from the street, but up close it was mostly moss, dandelions, and that patchy grass that always seems to yellow no matter what you do. Every time I mowed, I felt like I was just maintaining something I didn’t even enjoy.
I wanted food, not lawn. And I wanted a garden that did not fight me at every turn. So I decided to commit to a raised bed garden, even though I had no idea what I was doing. Sometimes the best way to learn is to just build it and figure out the rest as you go.
Planning the symmetrical raised beds
I measured the backyard like I was preparing for surgery. The space was about 20 feet wide and 24 feet long, which felt huge once I sketched it out on graph paper. I decided on four beds, each 4×8 feet, arranged in a neat grid with a wide center path. Symmetry worked because the space was already rectangular. Square corners and even spacing make everything look intentional, even when your plants are a little wild.
Here’s what actually worked for me as a beginner:
- Use untreated cedar or pine. Cedar lasts longer but costs more. Pine is fine if you line the inside with landscape fabric, which I did.
- Make the beds no wider than 4 feet. You need to reach the middle without stepping on the soil.
- Leave at least 2 feet between beds for walkways. I used 3 feet for the main path, and I’ve never regretted it.
- Level the ground before you assemble anything. I skipped this at first and one bed wobbled for a whole season.
Building the frames took one Saturday. My back complained, but the moment I stood back and saw that clean row of wood boxes, I knew the garden makeover was going to be worth it.
Gravel path: the pretty and the practical
I went with light beige crushed stone for the gravel path. It brightens the whole garden, especially on gray days. The color also hides pollen and dust way better than white gravel, which I learned from my neighbor’s yard. She chose white gravel and it looks like a chalky mess by August.
Laying the path was more work than I expected. I dug down about 3 inches, laid a weed barrier, then filled it with stone. The first time I walked on it, I felt like the whole place clicked. The crunch under my boots told me I had built something real.
One thing nobody mentions: gravel migrates. You will find little beige pebbles in your shoes, your garage, your dog’s paws. That is fine. The path looks gorgeous and drains like a dream after rain. I highly recommend a gravel path for garden beds if you like the look and don’t mind a stray stone now and then.
The gray garden shed and the tool wall
My garden shed was already there, painted a dull gray that fit the neighborhood. The inside was a black hole of clutter. I could never find the trowel, and I owned three broken rakes. So I decluttered, then I mounted a simple pegboard and a few hooks on the exterior wall outside the shed.
Shovels, rakes, a hoe, and a spade now hang within arm’s reach of the gravel path. No going inside, no digging through junk. Just grab and go. The gray door contrasts nicely with the dark wood of the beds, too. I did not plan that part, but it makes the whole scene look like it was designed for a magazine.
I also added a small shelf next to the tools for gloves and a bucket. Honestly, the tool wall is the thing I get compliments on the most. People walk up and say, “Oh, that’s handy.” It is. It did not cost much either.
Planting the leafy greens
I filled each bed with a mix of compost and topsoil, about six bags per bed. The fresh dark soil looked so good I almost did not want to plant anything in it. But I did. I planted kale, Swiss chard, spinach, and lettuce. All leafy greens, all easy to grow, all perfect for a raised bed garden.
The beds get enough sun because I oriented them east to west. That means the taller plants do not shade the shorter ones. The greens took off like crazy. Within three weeks, the beds looked like a jungle of green and purple. My neighbors started stopping by to ask what I was doing, and I gave away a bag of kale to everyone who asked.
I have a small confession: I planted too much. Four beds of leafy greens is a lot for two people. But I would rather have too much than not enough. I froze some, gave away even more, and learned to make pesto with chard stems. It works.
What I would do differently next time
The garden shed wall is a win. The gravel path is a win. The raised beds are a win. But there are a few things I would change if I started this garden makeover again.
First, I would put a drip irrigation system on a timer. I watered everything by hand this year, which was fine in spring but exhausting in July. Second, I would add a small bench or a spot to sit. I never thought my back would need a break. It does.
The gravel path also needs a steady edge. I used simple metal edging, but the stones push against it when you walk. Next time I might use thicker pavers or even a wooden border. That is the kind of thing you only notice after a few months.
And here is the odd thing: I never planted flowers in the beds. Not a single one. I kept it all edible, but I missed the color that companion flowers like marigolds and nasturtiums would have brought. They attract pollinators and make the vegetable garden look alive. Next spring, that changes.
This vegetable garden before and after taught me that a good garden makeover is not about perfection. It is about making a space that works for you and gives you a little joy every time you step outside. I still find pebbles in my tennis shoes, and one of my greens bolted in the heat, but I would not trade this for a perfect lawn. Save this post if you need some motivation for your own raised bed garden, and start measuring your yard while you are at it. You will not regret it.
#vegetablegarden #raisedbedgarden #gardenshed #gravelpath #gardenmakeover
Leave a Comment